Cook's Country
Taste of Summer
9/12/2020 | 24m 23sVideo has Closed Captions
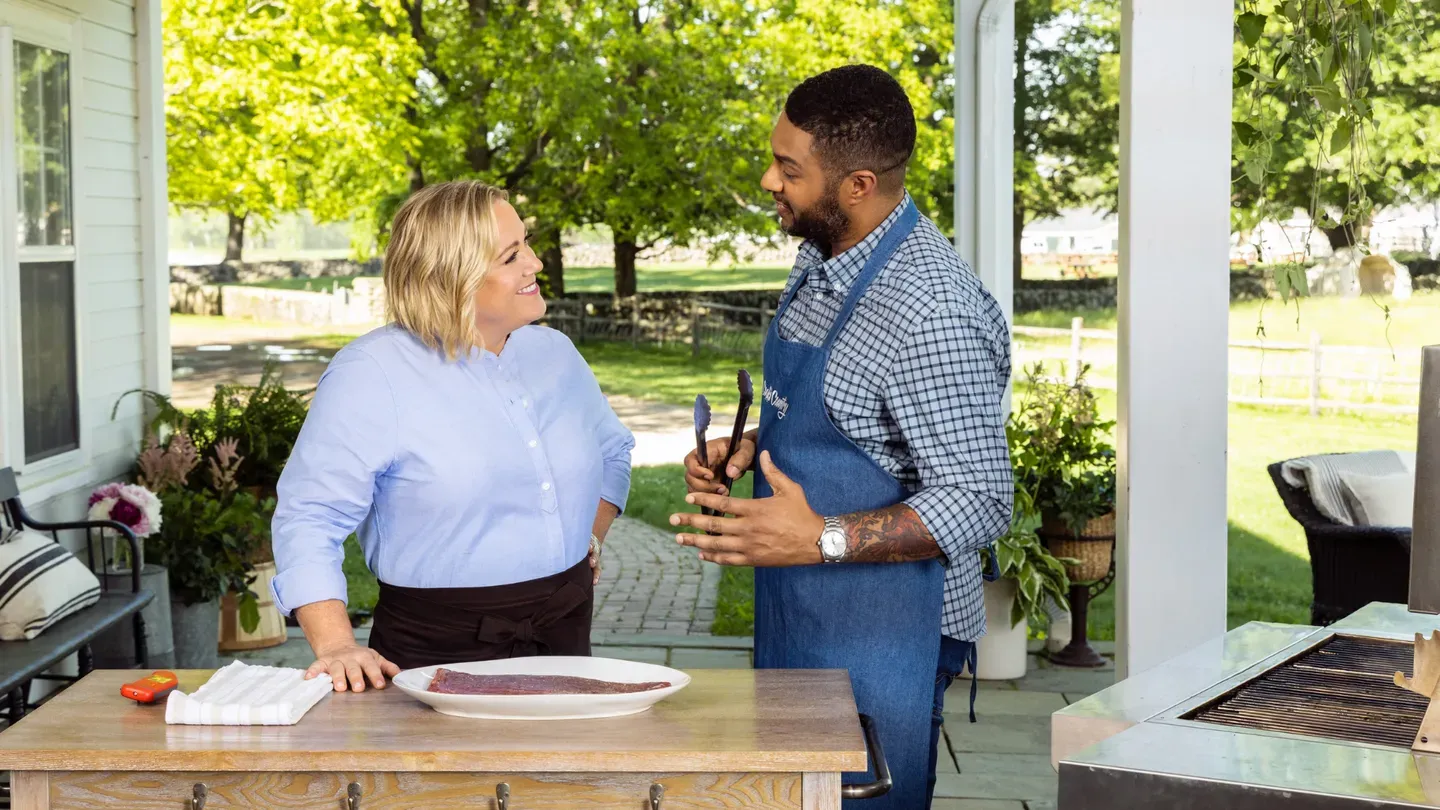
Test cook Lawman Johnson makes host Julia Collin Davison foolproof Grilled Flank Steak.
Test cook Lawman Johnson makes host Julia Collin Davison foolproof Grilled Flank Steak with Basil Dressing. Next, equipment expert Adam Ried reveals his top pick for herb keepers. Finally, test cook Christie Morrison shows host Bridget Lancaster how to make a showstopping Fresh Tomato Galette.
Problems with Closed Captions? Closed Captioning Feedback
Problems with Closed Captions? Closed Captioning Feedback
Cook's Country is presented by your local public television station.
Distributed nationally by American Public Television
Cook's Country
Taste of Summer
9/12/2020 | 24m 23sVideo has Closed Captions
Test cook Lawman Johnson makes host Julia Collin Davison foolproof Grilled Flank Steak with Basil Dressing. Next, equipment expert Adam Ried reveals his top pick for herb keepers. Finally, test cook Christie Morrison shows host Bridget Lancaster how to make a showstopping Fresh Tomato Galette.
Problems with Closed Captions? Closed Captioning Feedback
How to Watch Cook's Country
Cook's Country is available to stream on pbs.org and the free PBS App, available on iPhone, Apple TV, Android TV, Android smartphones, Amazon Fire TV, Amazon Fire Tablet, Roku, Samsung Smart TV, and Vizio.
Providing Support for PBS.org
Learn Moreabout PBS online sponsorship♪♪ ♪♪ ♪♪ ♪♪ -Today on "Cook's Country," Lawman makes Julia a foolproof recipe for grilled flank steak with basil dressing, Adam reveals his top pick for herb keepers, and Christie makes Bridget a show-stopping fresh tomato galette.
That's all right here on "Cook's Country."
-Traces of burnt bone found in the Wonderwerk Cave in South Africa suggests that Homo erectus was cooking meat over a live fire up to 900,000 years ago.
-Now, fast forward to 1939 at the World's Fair in New York, and Louis McGlaughlin debuts the BROILBURGER.
It's a commercial-sized gas grill that gave people and restaurants the ability to grill over a live fire, but now with the ease of gas.
-Then in the 1950s, the company started selling portable gas grills for home cooks.
-They called it the LazyMan, and it took off like gangbusters.
And today, roughly 112 million Americans own an outdoor gas grill.
-And that's what Lawman is going to use today as he shows us the best way to cook a flank steak.
♪♪ Flank steak is wildly popular because it's easy to just throw on the grill for a quick summer meal.
Isn't that right, Lawman?
-That's right, Julia.
But this steak is not without its problems.
There's a thick side and a thin side, and they very rarely cook evenly.
But today, we're gonna solve that problem.
-Alright.
-Now, first, I have 2 pounds of flank steak I'm going to pat dry.
-Not a lot of other prep needs to go on with the flank steak.
It's pretty much buy it and cook it.
-That's right.
Typically, a steak like this, people want to marinate it, but marinade is the enemy of good browning.
-[ Chuckles ] -Plus here, at the test kitchen, we found that a marinade only penetrates the surface of the steak.
-That's right.
And marinades also often contain an acid, like lemon juice or vinegar, and that acid actually breaks down the muscle fibers in the steak, so it turns it mushy, not tender.
-We're actually going to put a dry rub on the steak, starting with 2 teaspoons of sugar, 1/2 teaspoon of salt, and 1/2 teaspoon of pepper.
-I like how you're mixing them all together.
Makes it easier to sprinkle over the meat.
-Exactly.
You only have to sprinkle it once.
I'm sprinkling it from high so that it gets all over the meat.
-It actually looks like a fair amount of seasoning you're putting on there.
-Yes.
Now, the salt and the sugar, put on the steak far enough in advance, is going to dissolve and penetrate deep within the meat, unlike the marinade, which only penetrates the surface.
Now, we're gonna place it on a plate and cover it with plastic wrap.
And we're going to refrigerate it for a minimum of 1 hour, up to 24 hours.
Now, the longer the meat gets to sit, the more flavorful it's gonna be.
-And what happens if you go longer than 24 hours by chance?
-It's gonna be too salty.
-Alright.
-I'm just gonna throw this in the fridge.
♪♪ So, Julia, the grill's been heating for 15 minutes.
It's nice and hot.
So before we start, I'm going to clean the grill.
-Ooh!
You can see the heat coming off that grill.
You're not messing around.
-First, I'm gonna scrape the grates.
And now I'm going to oil the grates.
-And when you do this, it's best to use vegetable or canola oil because it will polymerize onto the grates and create a nonstick surface.
And sometimes you'll see little drips of oil will drop down and cause little flare-ups -- totally fine.
-Now we can grill.
Because this steak has a thick end and a thin end, it's very hard to cook it evenly.
So we're gonna use a method where we have a hot side of the grill and a cool side of the grill.
So I'm going to leave the primary burner on and turn off all the other burners.
You're going to be tempted to pat it dry, but you don't want to.
The sugar is going to caramelize and brown and give the steak great flavor.
Now, to make sure that sugar caramelizes, we're going to take the entire steak and put it on the hot side of the grill for 2 minutes per side.
It's been 2 minutes, Julia.
Now we can check on our steak.
-Mmm!
-Just gonna flip it.
And it's going to go for another 2 minutes.
Julia, it's been 2 more minutes.
Gonna check on our steak.
-Mmm.
Looks good.
-Now we're gonna flip and rotate the steak so that the thin end is on the cool side of the grill.
And we're gonna continue to cook this for 2 to 6 minutes, flipping every 2 minutes until the thick side reaches 125 degrees for medium rare.
♪♪ It's been 2 minutes.
We're gonna check on our steak.
Gonna flip it.
-Mmm!
Beautiful.
-Nice and brown.
-Yeah.
Still keeping that thick end over the hot side of the fire.
-Now we're gonna take its temperature.
We're putting it in the thicker side, looking for 125 degrees.
And we're right there.
It's perfect.
-Nicely done.
So depending on how thick your steak was, could take up to 4 minutes longer.
-Exactly.
Now, you're going to notice, we transferred to a wire rack instead of a cutting board right now.
We want to let the steak rest for 10 minutes, and if any of the juices leak out, we don't want it to pool and get rid of any of the browning that we've accomplished.
-Yeah.
I have to say, this is a gorgeous brown crust.
That's hard to get on a thin piece of meat like this.
-Exactly.
That sugar helped that out.
Now we're gonna tent it with foil and bring it inside.
♪♪ Julia, the steak's been resting for a few minutes.
Now we have time to make our dressing.
-Mmm.
-I'm gonna start with chopping some basil.
We want about 1/4 cup.
I like to chop the basil at the end of the recipe so that it doesn't oxidize and turn brown.
To that, we're going to add 1/4 cup of extra virgin olive oil.
1 shallot chopped fine.
2 tablespoons of red wine vinegar.
2 teaspoons of lemon juice.
1 teaspoon of honey.
1 garlic clove, minced.
1/2 teaspoon of salt.
1/2 teaspoon of red pepper flake, and 1/4 teaspoon of pepper.
-Oh, that looks good.
-The meat has been resting for 10 minutes.
Now it's time to slice.
-Mmm.
-Now, normally, a steak like this would be unwieldy to slice thin.
We have a solution for that.
We're gonna make two smaller steaks by first cutting the steak in half with the grain.
And now we're gonna cut smaller steak on the bias.
Very thin, about a quarter inch.
-Look how perfectly cooked that steak is.
I mean, it has a perfect pinkness all the way through from the thick end to the thin end.
That's really hard to do.
[ Chuckles ] Look at that gorgeous steak.
-Now I'm going to add that delicious basil dressing on it.
-Mmm.
Lawman, that is beautiful.
That looks really elegant.
I mean, that's company-worthy right there.
-It is.
Thank you.
-[ Chuckles ] -All that marinade flavor is on the steak.
Now it's time to eat.
-Gorgeous.
Mmm.
-Nice and tender.
-The flank steak is super tender.
That salting overnight, especially if you can do it for a day, really does magic with the texture of the meat.
-Great char on it.
-Mm-hmm.
Mmm.
And I love this basil dressing.
It really does sort of brighten up the meat, so it tastes summery.
-It is a really good dressing, -Mm-hmm.
Lawman, this is delicious.
Thank you.
-You're welcome, Julia.
-If you want to make this easy recipe for grilled flank steak, season meat with salt, pepper, and sugar and refrigerate it for at least an hour.
Grill over a two-level fire and flip it every 2 minutes.
To serve, slice the steak against the grain and drizzle with a simple basil vinaigrette.
From "Cook's Country," a foolproof recipe for grilled flank steak with basil dressing.
♪♪ -Using up all of those leftover herbs before they go bad can be a real challenge.
But luckily for us, Adam's here, and he's gonna tell us whether herb savers can be the answer.
-You're right.
Herbs come in frustratingly large batches, and not every cook can use them all up.
It becomes sort of this challenge.
So you want to keep them fresh for as long as possible.
I would call that a hot button kitchen issue.
-Sure.
-Of course "ATK" has its method.
We have determined that wrapping a bunch of herbs in a slightly damp paper towel and putting it into a zipper lock bag, like so, and putting it in the fridge without closing it will keep them fresh for a reasonably long time.
There's one downfall with this method of which I am guilty.
If you are not careful taking it out of the fridge, putting it back into the fridge, taking out and replacing things around it, things can land on top of the herbs and they can get crushed and kind of gross-looking.
-It's a big downfall.
-That's why we were interested in these herb keepers, because they offer a higher level of protection.
There are five different keepers in our lineup.
The price range was about $15 to $30, and they all have the same basic design, which is that of a vase.
You put a little water in the bottom.
You put in the bunches of herbs so that the bottom of the stems are in the water, and then the stalks and the leaves are elevated up out of the water.
They stay dry.
You just reach in, grab what you need.
-Gotcha.
-We tested these with tender herbs -- cilantro -- and hardier herbs -- fresh thyme -- in different locations in the fridge because the temperature varies a little bit at different locations.
-Sure.
-And also, we tested them with basil at room temperature on the counter because we generally don't refrigerate basil.
And the testers went in daily just to inspect the herbs, remove any leaves that were looking a little suspect, tend to the water, change it if they needed to.
And they noted the end point by which the herbs were sort of too spent to use.
Now, they all did a pretty good job keeping the herbs fresh, as did our "ATK" method.
It was all upwards of 40 days, which is probably long enough to get through a bunch of herbs.
-A couple of salsas in there.
-Seriously.
But testers noted some of these herb keepers were easier to use than others.
This one presented a problem for two reasons.
One is that you have to screw the base on tightly, and if you don't do that and you move it without the base, you end up splashing water all over the place, which is, you know, not major, but irritating.
-I can say that that little bottom piece would be lost after about a week if it's in my house.
-[ Laughs ] This is true.
We only had very responsible testers testing these things.
We didn't have teenage boys, like, throwing the pieces around.
-Nope.
That's a future cereal bowl.
[ Both laugh ] -You know, another problem with this one was the shape was kind of tall and narrow.
So not every tester was able to get their hand in easily to pull out the herbs without sort of upsetting the whole bunch.
-Sure.
-Splashing water all over the place.
The last issue was that the lid was solid.
No ventilation holes.
-Right.
That's why we leave the bag open when we use that other method.
-Exactly.
There was no way for moisture to escape, and drips ensued.
-And if moisture gets on the leaves, that's when it all starts to go bad.
-Exactly, exactly.
-Right.
-And a couple of these herb keepers had the same problem.
These three in front of you, no ventilation slats on the top.
So they all got a little bit drippier than the testers really wanted.
This one answered a couple of those questions.
This one is adjustable for height.
-Oh.
Oh, I like that.
-Yeah.
You can reach your hands right in, pull out herbs really neatly.
-Yeah, look at that.
Yeah.
Right there.
-Yeah.
It's great.
You don't upset the whole bunch, and then when you want the extra protection, you just lift it right back up.
-Very smart.
-And you're good to go.
It had dividers so that you could actually separate different bunches of herbs and keep them nice and neat.
And this one has a ventilated lid, so it helps manage that condensation.
This one also kept the herbs fresh for almost eight weeks.
-Really?
-Yeah.
Crazy long.
So, you know, if the "ATK" method is a concern and you are worried about crushing the herbs in the zipper lock bag, this is definitely your herb keeper.
-Okay.
-This is the Cole & Mason Fresh Herb Keeper.
It's about $17.50, and it was far and away our favorite of the five.
-Well, there you go.
The winner was the Cole & Mason Fresh Herb Keeper, and it runs about $17.
Thanks, Adam.
♪♪ Taking vine-ripe, juicy summer tomatoes and turning them into a fresh tart for the summer.
Well, it sounds like a good idea.
But as Christie's going to show us, it's not as simple as it seems.
-No.
Bridget, these tomatoes are super juicy, which is a blessing and a curse.
-We love them.
-Yes, we love them.
But it makes it difficult to have a tart dough not get soggy.
-Right.
It turns into cereal.
-Right.
-With milk.
[ Both laugh ] -And we don't want that.
-No.
-So we have to manage the juice for this tart.
So the first step is to get rid of a lot of it.
The second step is to waterproof our crust, so then any remaining juice won't make the crust soggy.
-Gotcha.
-So we're using a really simple pastry dough to start.
-Okay.
-I have 1 1/2 cups of all-purpose flour and 1/2 teaspoon of salt.
I'm going to mix this up, process it for about three seconds just to get it all worked in.
Now I have 10 tablespoons of unsalted butter.
I've cut it into 1/2-inch pieces and chilled it so it's nice and cold.
-Okay.
-And I'm actually going to pulse this because we don't want to work it too much, but we do want to get some nice, coarse crumbs.
-Okay.
-So about 10 pulses.
I think that looks good.
Now I'm going to put this into my large bowl because I don't want to work this down anymore.
-Because the food processor might activate too much gluten, and we want it tender, but something that's still going to hold together.
-Right.
So now it's time to add some water.
I have ice water here, and I'm going to add 6 tablespoons, just drizzled over the top, to get us started.
Alright.
So I'm just going to stir this together.
It's super easy.
You know, I should be able to press it and have it compact and stick kind of.
-Gotcha.
So it's not wet at all.
-No, it might be a little on the dry side, a little on the dry side -- will come together when it hydrates in the fridge.
Too dry and not sticking together at all means we need a little more water, so I can add up to another tablespoon of water if I need it.
-Gotcha.
-Okay.
That looks like -- you can tell just by pressing it, it's holding together.
-Yep.
-So would you mind giving me a little sprinkle of bench flour just so it doesn't stick?
Thank you.
So I'll take this out of the bowl, and I'm going to work it into a 4-inch disk.
-You're not rolling it out at this point?
-No.
No, this is just to get it into the refrigerator so it can chill and hydrate all the way.
So I just wrap this tightly.
Now, we'll let this chill for about an hour.
If you wanted to make it ahead, you could let it chill in the refrigerator for up to two days, or we could freeze it for up to a month.
♪♪ Bridget, the dough has been chilling for 30 minutes, so it's not done yet, but it is time for us to get started talking about tomatoes.
-Okay.
-So I have a pound and a half of tomatoes here.
And the cool thing about this tart is that you can use any kind of tomatoes you want -- mix of colors, the sizes don't have to be exactly the same.
Remember, this is chilled out.
Like, we're not getting all fussy about this.
-It's a whatever kind of tart.
-As whatever as we can be.
These are some nice heirloom tomatoes.
I have a yellow one, some beautiful red tomatoes.
They all work.
-Okay, great.
-So I'm going to start by cutting out the core with my paring knife and I'm just gonna cut this into 1/4-inch slices.
They should be the same thickness of slices just so everything bakes evenly.
-Gotcha.
-So if they're not all the same size tomatoes, that's okay, but we want the same thickness.
Now, we discussed before the juiciness of these tomatoes.
We want to get some of that juice out.
The way we're going to do it is by adding some salt.
So this is a teaspoon of salt.
The salt will draw the moisture out.
And it also seasons the tomatoes.
We'll just give this a stir.
And you can see it's already starting to draw some of the moisture out, but it's going to take a while to get as much out as we need.
-Okay.
-So I'm going to transfer this whole operation to my colander inside a bowl.
You can put it over the sink if you wanted to, because we're not going to do anything with this juice.
We're going to let this sit for 30 minutes.
And if you do your math, that means that the tomatoes will be ready just about the same time as the pie dough will be ready.
♪♪ Bridget, it's been a little over an hour, so the dough had time to chill.
And during that time, our tomatoes have had a chance to drain.
-Okay.
-So I actually pulled this dough about 10 minutes ago so it would soften slightly so it's a lot easier to roll out.
-Right, because if it was too cold, it just breaks.
-It breaks.
So I put a little bit of bench flour down on my surface.
Not too much.
We can always add more.
And I'm gonna roll this out into a 12-inch circle.
-Okay.
-It's nice and soft now, so I'm just going to make sure that I keep turning it and I keep flouring my surface if I need it.
Even though it looked a little bit dry when we put it in the refrigerator, obviously, it's super supple and nice to work with now.
No dry bits.
Let's check this.
12 there.
12 there.
-Oh, come on.
-I can't help it, Bridget.
Sorry.
You roll out enough doughs, you know what 12 inches looks like.
So I'm just gonna roll this up on my pin and use that to transport.
If it did overlap a little bit, no problem, because we're gonna fold this up.
-Right.
Galette-style.
-Right.
So that fits really nicely.
So let's move on to filling.
Our tomatoes have been draining.
I'll just take a look at how much juice... -Oh, wow.
-...came out of the tomatoes.
Now -- Lift that up for me.
-You bet.
-Awesome.
So I have some savory elements to add.
This is one shallot that I've sliced into rings.
-Okay.
-Nice and thin.
We'll have little slivers of shallot that will be really nice in here.
I have 1 clove of garlic that I've minced.
2 tablespoons of extra virgin olive oil, a little bit of richness.
This is a teaspoon of minced fresh thyme, 1/2 teaspoon of salt, and 1/4 teaspoon of pepper.
So we'll just give this a toss.
We want this to look pretty on the tart, too.
So we don't want to mangle the tomatoes.
You just want to toss it gently to get everything mixed in.
Okay.
That looks pretty good.
Alright.
So to keep on that savory theme, I have 2 teaspoons of Dijon mustard, and I'm going to spread that right on the tart.
You can just use the back of your spoon.
-A little goes a long way.
-It does.
And notice I'm not taking it all the way to the edge because we're going to fold that up.
So I just want to leave about an inch and a half of a border.
Okay.
That looks good.
Now, it is not a crazy notion to put cheese in a tomato galette.
It's the choice of the cheese that we're using that's a little unorthodox.
-Alright.
-I have 3 ounces -- that's 3/4 of a cup -- of shredded Gruyère cheese.
I love it.
It's so nutty and -- and tangy.
-Tangy.
-But it's also an aged cheese, so while it's going to melt, it's not going to add any moisture to the crust.
So it's actually going to create kind of a shield to effectively waterproof the crust.
So when we put the tomatoes down, they won't sog it out.
Alright.
Our barrier's down.
Now these are ready to go in.
So I'll just start at the edge of the cheese and I'll overlap the tomatoes slightly.
-Look how beautiful.
-Aren't they pretty?
And, you know, there's all this other goodness in there, too.
So, you know, you'll get some pieces of shallot, dollop them over the top.
-Mm!
-And if you have some imperfect pieces of tomato that you've been a little too rough with, put them on the bottom layer.
Have some pretty yellow ones here.
So I'm going to put those closer to the middle.
-Beautiful.
-Now, there's always room for more cheese, which is my family mantra.
-It's going on my gravestone.
-[ Laughs ] So we have the Gruyère on the bottom -- shredded.
That's our water-proofer.
Now I'm going to add another aged cheese on the top, which is Parmesan.
And like the Gruyère, because it's aged, it doesn't have a lot of moisture in it.
So it will actually kind of help suck up some of the juices from the tomatoes and just give us a nice, slightly browned topping.
Now we're ready to fold.
So I'm just going to start folding my crust up just so that it extends about an inch over the tomatoes, and about every two inches, I'm going to make a little pleat.
And the pleat is going to give us a nice shape, and it's also going to help keep everything in.
-And the dough is supple enough that the pleats are sticking to each other.
-Yes, but we want to make it look more perfect.
So I have a large egg that I've beaten lightly.
We're just gonna do a little egg wash around the crust.
-Lovely.
-Give it a little shine.
-Mm-hmm.
-Fancy it up just a little bit.
Okay, my oven's set at 375.
I'm going to bake this until this beautiful crust is a nice golden brown and the filling starts to bubble a bit, and that's going to take 45 to 50 minutes.
♪♪ -Oh!
-Oh, my goodness.
Juices are bubbling.
The crust -- See how shiny it is?
-It's beautiful.
-Oh, boy.
So it still looks a little juicy on the inside, and that's okay.
We're going to let this sit in the pan on the rack for 10 minutes, just to kind of let everything settle in.
Then I'm going to use my metal spatula to very carefully get underneath the crust so that I can shimmy it off of the sheet pan and onto the rack directly so that we can get the crust nice and crisp so it doesn't sog out.
10 minutes in the pan, 20 minutes out of the pan.
Bridget, we've been waiting way too long.
Now, one last thing.
We wanted to add just a little bit of freshness to this.
So I have some fresh basil leaves.
I'm just gonna give it a chop.
Nothing fancy.
We don't want to add this while the tart is still too warm.
-Right.
-It'll discolor.
So I want about a tablespoon, sprinkle on top.
Now, technically, this feeds four to six.
-I imagine this is accompanying other things on the table, right?
-Right.
This would be lovely with a salad.
-Mm-hmm.
-Looks so pretty.
Did you hear that little bit of crispness... -I did.
-...when I sliced it?
-I did.
It's a good sound.
-Clean slices.
-Yeah.
What's remarkable is you didn't fuss over it too much when you were making it, and it still looks like that.
-[ Chuckles ] Oh, I just got the Gruyère.
-I got a little nutty Gruyère.
Got a little bit of that soft shallot.
The shallot just kind of melts right in there.
-It's nice and soft.
-The tomatoes are still supple.
They're not dry at all, but they've given off a little bit of their juice into mix in with that Gruyère.
-Mm-hmm.
-This is as good as summer gets.
-I think so, too.
-Thanks for bringing it to us.
-You're too kind.
-This beautiful galette starts with a sturdy crust.
Toss a mix of tomatoes with salt, and then let them drain.
Toss with shallot and herbs.
Top the rolled-out dough with mustard and Gruyère, and then shingle those tomatoes on top.
Sprinkle with Parm and bake.
Finish with a little bit of basil and serve.
So from "Cook's Country," the very perfect picture of summer -- fresh tomato galette.
-[ Chuckles ] -Merci.


Support for PBS provided by:
Cook's Country is presented by your local public television station.
Distributed nationally by American Public Television